The Right Block
First,
I stole two rumble motors from a spare Xbox controller I had laying
around.
No wire cutting or desoldering was involved. The motors simply needed
to be lifted, and their power connectors unplugged from the PC board.
When finished, the controller continued to function just fine without
the rumble. |
 |
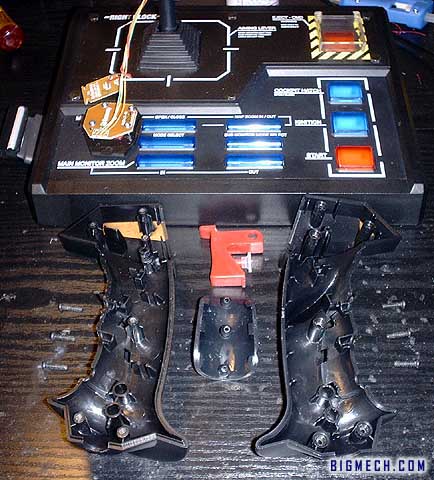
I began with the control stick on the rite controller block. When unscrewing
the controller for the first time, you will hear a snap as each screw is
loosened. Not to worry- That just certifies that you are
the first to disassemble the controller. Before separating the two halves
of the control stick, it may help to pry one edge of the rubber
grip away from where it is connected to the controller's plastic. There
are three lips on either side of the rubber grip. These are wedged in to
three
small openings on either side of the grip fitting, on the controller.
Separating the control stick can be slightly tricky. You can't simply pull
them apart due to the rubber grip holding them together, as shown in the
image. I had to separate them just a little. Then, pull away one half
on an angle,
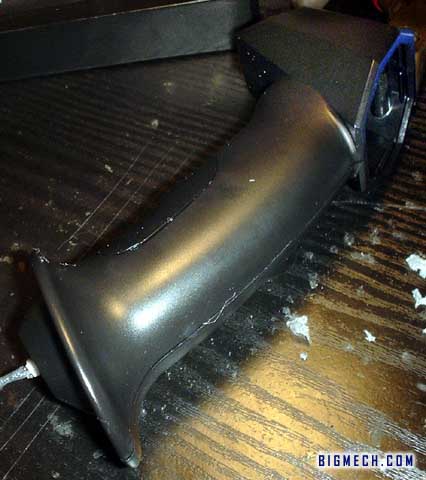
slightly rotating it away from the rubber grip. Handling that rubber grip
thing was quite a challenge. The back of it is covered with the stickiest,
messiest
adhesive known to man. The stuff never dries and sticks to anything.
|
NOTE:
If you disassemble your controller grips, you WILL get sticky! I would
not attempt to mess with that rubber grip without Label and Adhesive
Remover spray. I even had to use it on my hands. Nothing else removes this sticky
jell stuff. |
 |
There isn't much inside
the control stick. However, the placement of the parts is important.
Look it over and take note of how everything is positioned. |
The innards are easily
removed without any unscrewing, tugging or clipping. |
 |
|
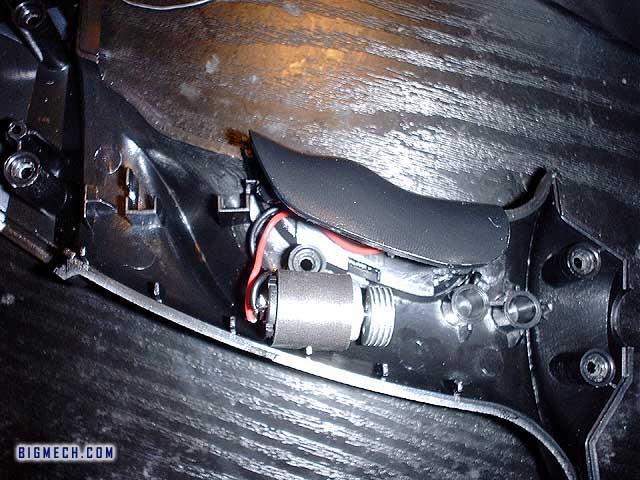
At this
point, I wedged the smaller rumble motor between one of the cylindrical
screw wells and plastic reinforcement tabs. It was a perfect fit! |
This
is a good time to check the fit. I replaced both sides of the control
stick
to confirm that the motor would fit when all is reassembled. It was
not necessary to screw it together or replace the rubber grip, at this
time.
I shook the handle a bit to make the weights on the motor move around.
You want to make sure they won't be banging against the plastic when
the motor is running. It may take a few adjustments to get it perfect.
When satisfied, I added hot glue to a few spots around the motor to
reinforce it in place. We'll, leave the controller stick off for now.
It makes
working under the
block a little easier. |
 |
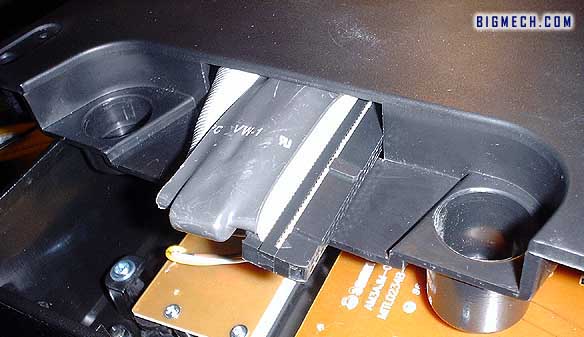 |
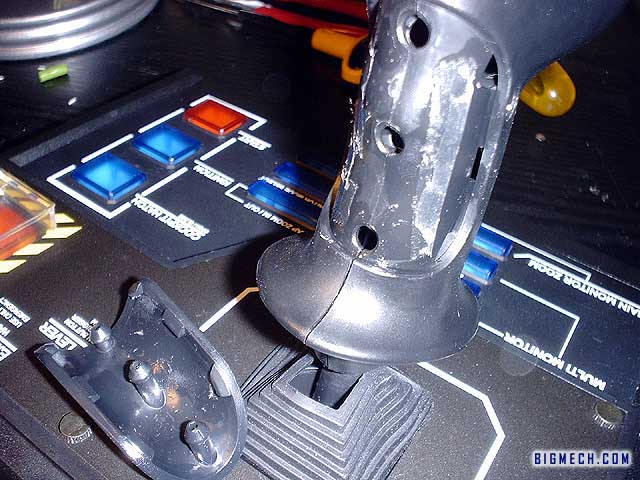
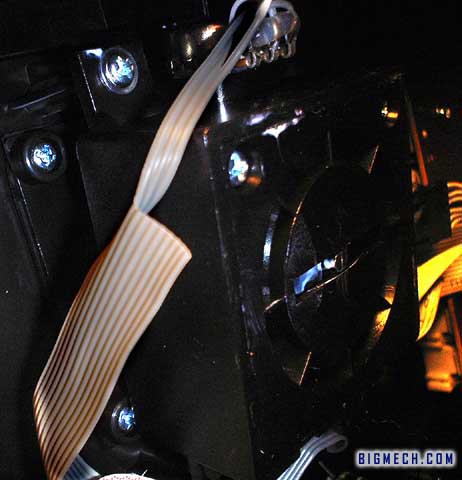
Opening
the control block is a cinch. Just remember to remove the padded feet
and the screws beneath them. You may need a thin Phillips screwdriver
to reach down the narrow screw wells. Also, the ribbon cable connector
will not fit through the opening unless you fold the cable at a 90 degree
angle, as shown in the image. Careful not to tug too hard. |
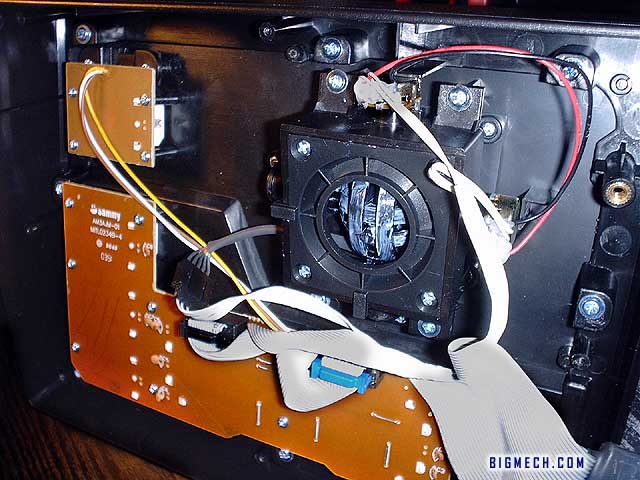
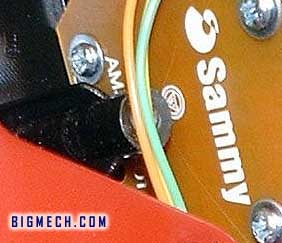
The inside of the controller's blocks are spacious and easy to work in. Perfect
modding environment.
Notice, not all of
the ribbon cable conductors are in use. This is extremely convenient.
It's like Sammy wanted me to mod it! |
 |
|
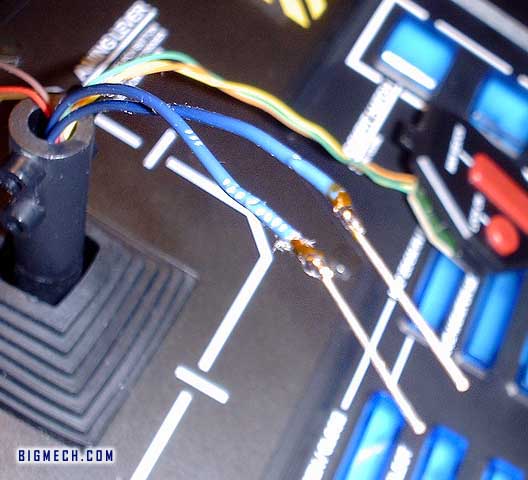
I pulled
two of the conductors away from the rest then stripped and tinned the
ends. Note: These are conductors 39 and 40 (40 being the one on the very
end). You may need something sharp, like an Xacto knife, to get them
started, when pulling them away. Then I took two long wires and soldered
them to these ends. You may want to mark the wire or use two different
colors of wire, in order to know what wire goes where. A multimeter could
also come in handy
later on. |
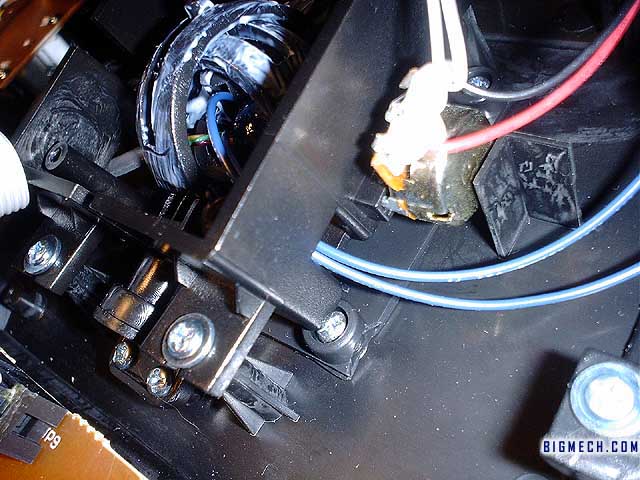
After removing the 4 screws and opening the top of the control stick axis/pivot
chamber, I fed my new wires through a small space leading into the chamber. |
 |
 |
Then, into the shaft
leading to the controller stick. |
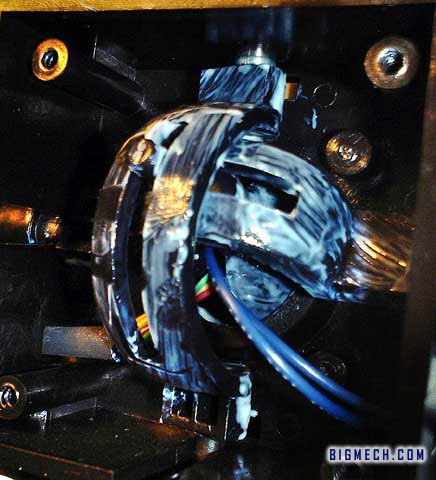
Be sure to pull enough
through. You want to have a decent amount of slack on both ends. Remember,
this controller will be moving around a lot. |
 |
 |
Then, I stripped,
tinned and added leads to the ends. For the leads, I just used spare
leads I had trimmed away from a resistor. |
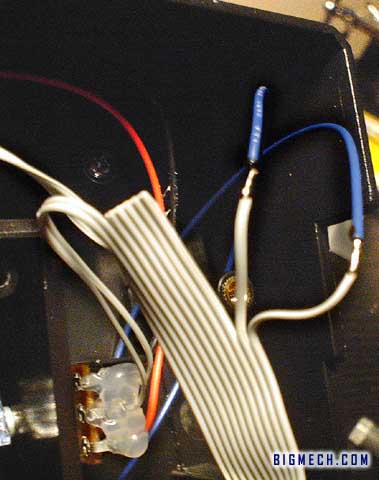
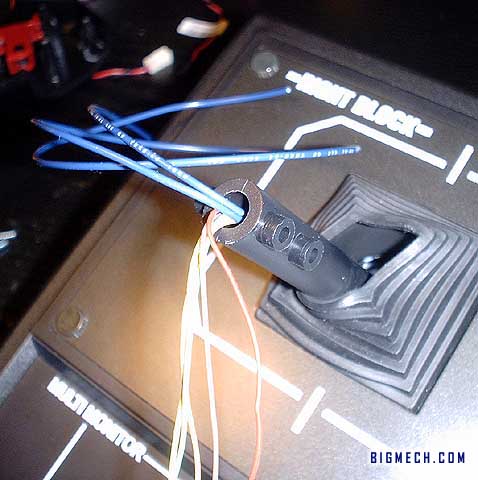
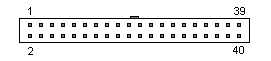
If
you used the two free conductors toward the edge of the ribbon cable
(conductors 39 and
40), as I did, they will lead to the two plugs on the end of the ribbon
cable connecter. The image illustrates how the conductors relate to
the connecter. I confirmed this with a multimeter. Or, you could use
a battery,
resistor and an LED to test the conductor paths. Use whatever means
you can come up with to figure out what wires go to what plug. Keep
in
mind;
these
will
be
traveling
to the center controller block. You will want to mark these wires along
the way. You'll need to know which is which toward the end of this mod. |
 |
 |
I insulated
the soldered area with electrical tape. Then, I plugged the leads into
the rumble motor’s power connecter. This is where marking your
wires or using different colors comes in handy. You want to make a note
of
what wire is positive (RED) and ground (BLACK) throughout this mod. |
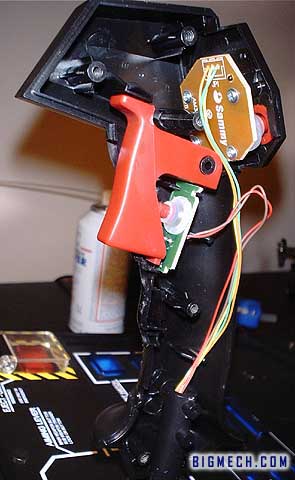
Once
everything is in place, it is time to reassemble the control stick.
Putting the control
stick back together can be challenging. And by "challenging" I
mean, pain in the ass. Managing the innards, the sides and that sticky
rubber grip may be more fun then you had bargained for. One thing to
watch for: Make sure your wires are not blocking any of the screw wells,
as shown in the image. These press firmly against one another when
the controller is assembled. You don't want anything obstructing them. |
 |
If the halves
of your controller are very close to coming back together, but something
seems to keep them slightly apart,